Submitted by Boboshempy on February 9, 2010 - 9:29am

PR’s Brown Sugar Cinnamon Babka

Well, this is actually the Chocolate Cinnamon Babka recipe from Peter Reinhart's Artisan Breads Every Day. I followed the recipe to a T except I substituted the chocolate for dark brown sugar, as per the request from my girlfriend, who barely ate any after it was done, haha.

I really like how it came out and I love the look. A loaf doesn't get any cooler looking than this and you can't go wrong with a rich, sweet, cinnamony, streusel topped bread. I gave my parents half the loaf and I pretty much ate the rest by myself over two days, my girlfriend only had a taste and acknowledged it was fantastic, she considers herself a expert. She had to look good in a bikini the following week so she said "I should stop making bread!".

This is the first bread I made out of this book, I have made many from PR's other books. I have my eye on taking a whirl at the croissant recipe in this book but I don't know when I will get to that. This was easy, fast, and fun to make and I will definitely be making it again, next time with the chocolate. It is a cool bread to bring to a dinner party for desert, in my opinion.

Enjoy the pictures,

Nick


Submitted by michelemgm on September 28, 2009 - 9:12am

Looking to purchase artisan bread factory

I have a purchaser who is eager to buy an artisan bakery in the New York area. He wants to purchase the business, factory, building, equioment, and recipes as a whole. Is there a family business that is ready to retire? Please call Michele Michael 631 245 2674. We are lookning on Long Island and Queens.

Submitted by dmsnyder on April 24, 2009 - 6:42pm

Tom Cat's Semolina Filone from Glezer's "Artisan Breads"


My favorite Semolina Bread.

The formula and procedures I used are here: Tom Cat's Semolina Filone (from Glezer's Artisan Breads)

David

Submitted by blockkevin on March 5, 2009 - 12:15pm

Hamelmans 5 Grain Levain...well almost


Hamelmans 5 Grain Levain


 So after much discussion on these boards I finally decided to make this bread myself to see what all of the fuss was about. I can't believe I waited so long...This is absolutly one of the most delicous breads that I have ever tasted. I did make a few adjustments to the formula based soley on what I had available to work with (noted in formula below), but I tried to recreate the formula as close to the original as possible to get a sense of the bread in it's purest form. I also recalculated his formula so that I would end up with approx. 1200g of dough, which is the appropriate size to fit on my stone.


Liquid Build

  • KAF AP Flour 128g 100%
  • Water 160g 125%
  • Mature Culuture(mine is 100% Hydration) 26g 20%

Soaker

  • Bulger Wheat(The original formula calls for Rye Chops) 47g 27%
  • Flaxseeds (mine happened to be golden) 47g 27%
  • Sunflower Seeds 39g 23%
  • Oats 39g 23%
  • Boiling Water 204g 120%
  • Salt 3g 2%

Final Dough

  • KAF AP Flour(The orignal formula calls for hi-gluten flour) 255g 67%
  • Fairhaven Mills Whole Wheat Flour 128g 33%
  • Water 133g 35%
  • Salt 9g 2.3%
  • Soaker(all) 379g 99%
  • Liquid Build 314g 82%

1. Liquid Build & Soaker-approx. 12 hours before mixing elaborate liquid build, and prepare grain soaker.

2. Mixing-As per the instructions in the book all of the ingredients are placed into a mixer and mixed on low speed for a few minutes to hydrate the flour. I found that I needed to add about 2 Tbsp more water. I suspect that the bulger wheat in the soaker absorbed more water than the rye chops would have. When the dough begins to come together increase speed to medium and mix until moderate gluten development is reached. Seeing as I didn't have any hi-gluten flour I mixed a little more thouroughly then I would have otherwise. On speed four in my kitchenaid mixer I mixed for 8 minutes, and I achieved a fairly high level of develpment.

3. Ferment- 3 Hours with a fold at 1.5 hours. (Orignal formula calls for 1-1.5 hours)

4. Divide- Divide the dough into 2 approx. 600g. portions.

5. Relax- shape the dough into loose boules, and allow to bench rest for approx. 20 minutes to allow for easier shaping.

6. Shape- shape the dough as desired and place between folds of bakers linen or in prepared bannetons. Round or ovals are what Hamelman suggests.

7. Proof- Approx. 1 hour at 76 deg. F., or alternatively retard in the fridge overnight for up to 18 hours.

8. Bake- 30-35 minutes for 600g. batards 460 deg F. on preheated stone with steam for the first half of the bake. Turn the oven off and prop open the door and allow bread to dry out for an additional 10 minutes before removing from the oven.

9.Cool- allow the finished bread to cool for at least 3 hours before cutting.


Final notes and Impressions

The crumb on this bread was unlike anything I have ever made before, it is incredibly soft, and creamy on the tongue. The crust was lightly crisp, and not as thick as I would have expected given the overnight retarding. I would definetly make sure this bread is cooked long enough, and hot enough as it has a good deal of water from the soaker, and it needs a thourough bake to fully dry out.

Dsnyder once refered to this bread as a "flavor bomb" and I would enthusiasticly agree with that assessment. It has wonderful tart notes from the levain, and a lovely complexity from the soaked grains. I hope you all get the chance to make this bread sometime to fully experience how delicious it is.

Happy Baking

Kevin

Submitted by johnster on December 12, 2008 - 11:06pm

Jeffrey Steingarten's Pane Genzanese!


A few years ago, I read a chapter in "It Must Have Been Something I Ate" where Jeffrey Steingarten discussed the lengths that he went through to master Pane Genzanese.  The story was so inspiring (and hilarious) that I, who at the time lived in a tiny town in Upstate New York, far from a bakery where one could score a decent loaf of French or Italian bread, decided to buy the BBA, got a big and heavy baking stone, and threw myself headlong into yet another hobby that would become an obsession and threaten to consume ALL of my precious and limited spare time. 

Before then, my bread baking had been limited to a one and a half pound loaf bread machine.  But, since that reading, I have baked many and varied loaves of bread and visited this site countless times.  I finally worked up the nerve to try this BIG, nine and a half cups of flour, four and a half pound loaf, and I can report on it, tonight.  

Impressive in it's appearance, the crust is pleasantly bitter and crunchy with a very open crumb, and would be enough to bring to a quite large dinner party.  (With only two adult diners and one infant in our house, I will be giving away half of this loaf to a neighbor in order to save me from myself...)  Today was a practice run for baking bread to bring with us to my wife's family for Christmas.  Yes, the time has come to bake for the extended family, and I am both excited and terrified...

Day of baking will be 9-10 hours, so I start before I have breakfast and even coffee!  There will be plenty of time for eating and drinking during the rise.

Recipe for Pane Genzanese adapted from Jeffery Steingarten's "It Must Have Been Something I Ate":

For the biga:

Half cup of day-old bread dough.  (If you don't have that, mix 2.25 oz. AP flour, pinch of instant yeast, 1/4 tsp. kosher salt, and 1.5 oz water.  Knead and leave covered at room temperature, overnight, to ferment for the next day's baking.)

8 oz. water

9 oz. AP flour (2 cups)


Stir together half the flour and all the water.  Gradually work in the day-old dough, breaking it up and working it in piece by piece.  When it is well blended, work for another three to five minutes, then set in a bowl, cover with plastic wrap and let rise to double (about 5 or 6 hours.)

To build the bread:

The batch of biga

3 and 1/3 cups water

31.5 oz. AP flour (7 cups)

1 and 1/4 tsp instant yeast

1 and 1/2 tbl salt

And, about a cup of wheat bran flakes, reserved.

Mix half the flour with the water, and gradually work in the biga, broken into pieces.  When smooth, add rest of flour, salt, and yeast.  Mix thoroughly and then knead until fully developed (about fifteen minutes with the dough hook on my Kitchenaid stand mixer.)

Move dough to a bowl, cover bowl with plastic wrap, and let rise by 25%, which will take about an hour at warm room temperature.

Pour out onto a VERY heavily floured counter.  Should form a circle 12-14 inches across.  Rest for ten minutes.

While resting, preheat oven and your baking stone (at least 14 inches to a side) to 500 degrees.

Flour a couche or a clean non-terry cloth dishtowel and spread 2 tbl bran flakes over it.  

Shape dough into a loaf by folding the far end 2/3 over towards yourself, and tamping that seam, firmly, with your fingers.  (The resulting seam will be in the shape of a big dougy smile.)  Work your way around the loaf like that, pulling 2/3 over toward the opposite end.  Complete that circuit, twice, to get the loaf smaller and and the skin tighter.  Invert onto the couche,and cover the loaf with another 2 tbl of the bran flakes, so that they will be on both the top and bottom of the loaf.  Cover loaf with the half of the couche that the dough is not resting on (or a second dishtowel, if there is not enough to cover the top) and let rise in a very warm place for 40-45 minutes.  I boil a cup of water in the microwave, then leave the hot water inside, put the couch on a 12 inch pizza box and put it inside the microwave, too, while leaving the door slightly ajar so that the light stays on, providing even more heat.  This keeps the temp right around 80, and the moisture keeps a crust from forming.  Dough will rise by about an inch to let you know it's ready.

Now, cover your peel with three more tbl of bran flakes.  Transfer dough to peel.  This requires that you invert the dough off the couche onto your hand, and then invert, again, onto the peel.  This move will be the most difficult thing that you do all day, so do it carefully.  

Steam the oven, and now move the dough to the hot stone.  Spray the bread with about twenty mists of water, close the oven door, and drop the temp to 450.

Bake for about an hour and ten minutes, total, and to an internal temp of 210.  At seven minutes, open the oven and spritz the bread a good twenty more times.  At forty minutes, carefully rotate the loaf one hundred and eighty degrees for even baking.  

When finished, cool on rack at least two hours before you succumb to temptation and hastily grab your bread knife while your wife puts the baby to bed and gently reminds you that you haven't mailed your Christmas cards, yet, that you had promised to mail no later than Tuesday.  And, did you really have the time to spend the whole day baking a "practice" loaf of bread, anyway?  Promise through cheeks filled with crust that you will get the cards out first thing in the morning, and tell her to hurry back and join you for the feast that awaits.

Enjoy your Pane Genzanese plain, with a meal, in place of a meal, or dipped in olive oil with freshly grated Parmesan cheese and a little bit of ground black pepper.  (My favorite!)  Yum!! 

Thank you, Mr. Steingarten, for introducing me to bread baking, for keeping it real on Iron Chef America, and for giving me such a precise and easy to follow recipe, both for this bread, and for Neopolitan-American Pizza.  (That will be another post.)

Johnster

Submitted by redcatgoddess on October 13, 2008 - 1:52am

Ciabatta - Italian Slipper bread

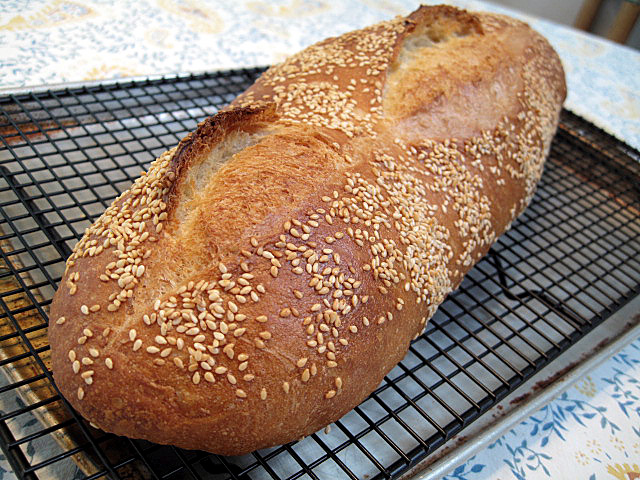
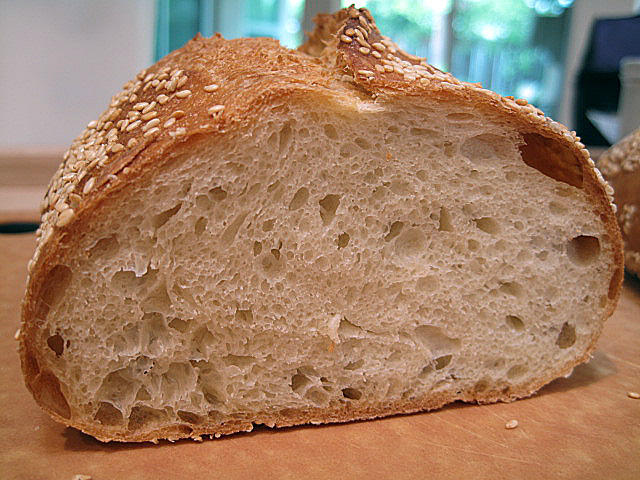
This recipe is listed in baker's yield.  You can increase the recipe to however large you want.  I did include the measurement in grams for 4 large ciabatta. This recipe will have the charactic large holes & heavy flour top that ciabatta is known for.

This is the traditional, true artisan bread, so no mixer needed!  All you need is a large mixing bowl, pastic bow scraper, and a table cloth or cloth napki.

Liquid preferment (also called 'sponge')

67% Bread flour   480g

83% water         600 g

1% instant yeast  7 g

Final Dough

3% salt              22 g

33% bread flour  240 g


  1. Mix the liquid perferment at room temperature, cover, let stand in room temperture for 1 hr 
  2. Mix the final dough mixture then toss into the sponge, squeez it to fully hydrate the flour.
  3. Cover & letferment in room temp for 20 minutes, then use a plastic bowl scraper, gently life the side of gooy dough and drap across the center of the dough. 
  4. Repeat step 3 twice at the increasement of 20 minutes (3 folds in 60 mintues)
  5. Cover, the let dough set in room temp for 30 minutes.
  6. HEAVY flour on the table cloth or napkin.  Make sure you put a GOOD layer of flour onto it to provent sticking.
  7. Gently guiding the dough onto the floured cloth with bowl scraper.
  8. HEAVY flour on the now top of the dough.
  9. Use a knife, cut the dough into quarters. Don't worry, you can't really 'cut' through the dough, this is just a guide for you to move them.
  10. Coat your hands with heavy flour, then slowly & gently move the cuted quarters to the 4 quarter of the cloth and let rest for 10 minutes.
  11. Move your hand gently to the back of the bread and gently make them into square shaps if you can.
  12. Let stand in the room temp for 20 minutes (resting)
  13. Preheat your oven to 475 degree F
  14. Gently invert the shaped dough onto your hand then place onto a parchment paper.
  15. Bake until lightly browned.

This is the quick photo that I took before I box it up & set it out to the neighbors.
ciabatta

Submitted by bucknor2011 on September 13, 2008 - 5:48pm

Artisan bread - Parmesan etc

Hello, i have been trying various Artisan breads from Safeway...i am really lost in finding the exact way on how should i serve this...i mean do i have it with Olive oil or with Cheese? or with butter? Do i serve it hot or just room temperature?

I am from asian country and we don't have these kinds of really good breads over there, so u have to pardon my question...

Thanks in advance

James

Submitted by pixy on September 11, 2008 - 6:35pm

Autolayse + Stretch and Fold

Hi, I have been looking a lot on your site and got excited by the idea of "autolayse". Wheat is naturally water resistant so the idea of letting it sit and soak is great.  While trying to fully understand how autolayse works I ran across "stretch and fold" which also sounds wonderful.  The idea of slowly stretching and folding rather than the hard work of kneading it by hand (I don't have a mixer). I would like to know how to use these methods with all my bread baking.  How can I take recipes that my family and I already like and incorporate the autolayse and stretch and fold methods?  Does anyone know more about one or both of these methods.  I have been searching the web and all I can find are definations and a several descriptions of how wonderful the bread looks.  There must be some basic formulas for both of these methods. 

Pixy

Submitted by DakotaRose on September 9, 2008 - 10:24am

Missing Page!!!


Hi!  I just got the book Artisan Breads in Five Minutes a Day by Jeff Hertzberg and Zoe Francois, but when I got part way through the book I discovered that a page was ripped in half.  I was wondering if anyone else has this book and would be willing to send me the page 131.  It is the last directions for the Montreal Bagels recipe.  I tried going back to the store and told them about it, but they said that they couldn't do anything about it.  That is the only page missing and would just tape in the directions if I can get them.

 Thanks so much in advance.

Blessings,
Lydia

Submitted by CountryBoy on July 17, 2008 - 11:55am

The Most Ignorant of All Questions: Cooling of Bread

Ok, this is bed rock ignorant but here goes: artisan baking is all about the details and I have not figured out about the cooling part.

Peter Reinhart says he enjoys his bread warm but that his Parisian baker friend says the bread must cool 2-3 days for it to mature.  Others say that as well.  Who is right?

And when cooling is it necessary to cover it with cloth and if so why?