The Fresh Loaf

A Community of Amateur Bakers and Artisan Bread Enthusiasts.

txfarmer's blog

txfarmer's picture
txfarmer

Sending this to Yeastspotting.

Click here for my blog index.

I knew it's gonna happen sooner or later when I moved to Seattle -- started an organic food delivery service last month, and loving it. Getting a box of fresh veggies and fruits every week, right at my front door (no draging pounds of grocery up to my apartment on 5th floor!), with great customer service, what's not to love. The following picture shows a part of what I got last week, yum!

It's fun to figure out how to use all those veggies. When I saw that bunch of arugula, I immediately thought of a soft Asian style sandwich loaf that I saw from a cookbook - the original version uses spinach, however, arugula is a similar but more fragrant substitute.

I didn't use the dough from that book either, instead I wanted to make use of my rye starter. I posted a 30% rye soft sandwich bread before,  so I know from experience that a soft and fluffy sandwich loaf can be made from rye starter and 30% total rye ratio. Here the same idea is applied, but with yet one more twist...

Instead of using butter or oil to soften the crumb, I wanted to use that carton of heavy cream that's about to expire, so the earlier 30% rye formula was completely revamped: using heavy cream as the main liquid source, no other fat except for what's in the cream, less sugar more salt to accomodate the flavor of arugula.

Iike all new formulas, I had to make it more than once to get it right. Rye, cream, fresh arugula worked together to make the loaf very very very moist, which means it needs to be baked MUCH longer otherwise the loaf would shrink/sink from all 4 sides while cooling. Previously, similar sandwich loaves would take about 45min to bake, this one took 70min, and the final bread was not dry at all.

30% Rye Sourdough Cream Loaf with Arugula
Note: 15% of the flour is in levain
Note: total flour is 270g, fit my Chinese small-ish pullman pan. For 8X4 US loaf tin, I suggest to use about 290g of total flour. For KAF 13X4X4 pullman pan, I would suggest using about 465g of total flour.

- levain
rye starter (100%), 11g
water, 19g
medium rye flour, 35g

1. Mix and let fermentation at room temp (73F) for 12 hours.

- final dough
bread flour, 189g (I used half KAF bread flour)
medium rye, 41g
sugar, 19g
heavy cream, 116g
milk, 57g
salt, 5g
egg, 32g
fresh arugula, 100g

1. Mix everything but arugula until stage 3 of windowpane (-30sec), see this post for details.

mix in arugula by hand or at low speed

2. Rise at room temp for 2 hours, punch down, put in fridge overnight.

3. Takeout, divide, round, rest for 1 hour. shape as instructed here for sandwich loaf.

4. rise at room temp for about 5-6 hours. For my pullman pan, it should be about 80% full; for US 8x4inch pan, it should be about one inch above the edge. The dough would have tripled by then, if it can't, your kneading is not enough or over.

5. cover with the pullman pan lid, bake at 375F for 45min, then 350 for 25min. I made extra dough to bake the mini loaf in the back - it's evident that if you don't have a pullman pan, this dough can also be made into a high sandwich loaf. The mini loaf is roughly half of the size of the pullman pan, and it was baked for 45min at 375F.

Very very very soft and moist. Fragrant from all that arugula.

Cream tenderizes the dough, yet leaving it airy and light. Great to make a sandwich with, or just eat as is.

txfarmer's picture
txfarmer

Sending this toYeastspotting.
Click here for my blog index.

Still keeping on practicing my lamination skills -- butter consumption in Seattle must've increased noticably since I moved here!

First the danish roll with cranberry cream cheese filling. The dough is exactly the same as the cream cheese danish posted here. Shaping is different:
1) Sheet out to 1/8inch thick, 16inch long, spread on filling

2. roll up and cut into 1inch thickness

3)proof and bake as posted here

Nice open crumb with honeycomb holes.

The tartness from dried cranberries complements well with the richness.

Now the savory version with WW flour and pesto filling.

WW danish dough (Adapted from many different sources)
Note: for details and tips on making croissants, please seethis post
Note: this recipe makes about 930g of dough, about 12 large danishes.

-levain
starter (100%), 44g
water, 75g
bread flour, 134g

1. mix and leave at room temp for 12 hours.

-final dough
bread flour, 258g
ww flour, 103g
milk, 135g
egg, 77g
sugar, 60g
salt, 10g
instant yeast, 7g
butter, 41g, softened
levain, all
roll-in butter, 310g

1. Mix and sheet out dough as the cranberry danish roll above.
2. Spread on fillings, first pesto, then cheese and Italian sausage

3. Roll up from both ends, meeting in the middle. Wrap and put in fridge for 30min for easier cutting.

4. Cut into 1inch thickness

5. Proof and bake as the cranberry danish roll above.

Pesto, cheese, sausage, classic combo for a very good reason.

Some ww flour add another dimention to rich danish dough, and it goes well with savory fillings.

txfarmer's picture
txfarmer

Sending this to Yeastspotting.

Index for my blog entries

Banana was on sale, as always, I bought way more than what I need, hence this banana levain bread. The idea came from Shiao-Ping's banana pain au levain, but I used the light rye levain formula I like.

Light Banana Rye

- levain
whole rye, 86g
water, 68g
rye starter (100%), 9g

1. Mix and let rise 12-16hours.

- final dough
bread flour, 510g
salt, 12g
banana, 280g, mashed, about 3
water, 138g
all levain

2. Mix everything, autolyse for 20 to 60min,mix @ medium speed for 3-4 min until gluten starts to develope.
3. Bulk rise at room temp (~75F) for about 2.5hrs. S&F at 30, 60, 90min.
4. Shape into batard, put in basketes smooth side down, put in fridge over night.
5. Next morning take the dough out to finish proofing, about 70min for me. Score.
6. Bake at 450F with steam(either put in preheated cast iron pot and cover with lid, or put dough on preheated baking stone and pour water in another cast iron pan to create steam) for the first 15min, take out the pan with water, keep baking for another 30-35min. Turn off oven and crack the door open a bit, and leave the breads inside for 10min before taking out.

Pretty happy with the scoring.

Crumb is open with noticable banana flavor - it's definitely not a sweet bread, but you would know there's banana in it.

I love how moist the crumb is, yet the crust was still crispy. Shiao-Ping is right, it's heavenly toasted with peanut butter. I think it's yummy with more sliced banana too -- and this way, more banana can be used up.

For the rest of bananas, I made quick bread using this recipe

It uses up both extra bananas and extra sourdough starter, perfect!

Moist, fragrant, soft yet with a bit of bounce, yum.

txfarmer's picture
txfarmer

I have disappeared for weeks for a good reason: went to Argentina and got on a ship to Antarctic! (Trip itinerary here: http://www.quarkexpeditions.com/antarctic-expeditions/crossing-antarctic-circle/overview) Here's my trip report...

So many penguins! We are required to keep >5 meters away from them, but there are so many, can't get away!

Some baby ones are so curious.

Water aerobics

Diving?

What did ya say?

All lined up and ready to ... nap

Chinstrap penguins, kinda look like traffic cops?

Going home after a dip in the freezing ocean water

Hello...

Got on a zodiac to kayak, but before we could starter, an orca whale got REAL close! Yup, both my husband and I were on that boat.

Coming, it's coming

And it went under out boat. Three times!

Close enough to see it's face and... eye lashes!

It didn't just happen once, the next day, a humpback got real close

I thought that was the best whale sighting I could possibly have, then the next day, while we were kayaking a whale leaped out

Twisted and turned. Twice.

Can't forget seals, they are so cute too

Often saw them on ice while we kayak nearby

We got to kayak everyday

We were just casual kayakers before this, but now, we love it

How can you not love beating through floating ice?

Just resting, for a little while

Picture perfect

Step #1 to camp in Antarctic: create a hole in the ice/snow so we won't slide into the ocean

No tent! Can you believe it?! Just a mummy bag and a waterproof bag.

Husband was not cold at all, I was freezing all night

A full moon coming up right when we were setting up the campsite, we stopped everything and stared in awe

One of those perfect moments

Sunrise, yes, it's a seal beside the ocean right by our campsite

We got up and the seal poked out its head

Took a hike up the snowy slope when we first landed on the continent

Great weather, even I got warm after the hike.

Staring at the breathtaking views

That's our ship

It can get real rough, especially around Drake Paasage. We managed not to throw up, but it was still too shaky to do much else

Crossing the circle! I could swear I felt a bump...

Went to Iguazu Falls before we departed from Argentina

Bigger and better than Niagra Falls? You decide

After the cruise, glacier near El Calafate, Argentina

A 24oz steak in Argentina, husband finished it all. Plus a big plate of potatoe, I was sure he's gonna get sick

More meat

Even more meat. And they don't eat it until 10pm. I just can't deal.

If you want to see more pictures, go to the sub-albums here on the right hand side: http://s78.photobucket.com/albums/j109/SJRunner/Antarctica%202012/

txfarmer's picture
txfarmer

Sending this to Yeastspotting.

Click here for my blog index.

This past holiday season was kinda crazy - a cross country move, a trip back to China, a new job, a new place to live, etc. etc. I did still squeeze in some holiday baking though, well, actually I only baked one holiday bread: the Francesco Elmi Traditional Sourdough Panettone I posted before, however I baked that bread many times. So many times that not only my friends and relatives around US and Canada got to taste it, I even carried 3 loaves back to China last month! Boy, did they go over well. My friends in China were nuts over it. It's not something commonly seen over there.

Even after New Year, I had another batch to make for Chinese New Year (coming up this weekend) as gifts. This time, I want to try something new, something better. But how to improve on perfection? Well, chocolate of course! Lots and lots of 70% Valrhona dark chocolate, in extravagantly big chunks. Oh Yeah.

The original recipe is from here (a google translated Italian baking forum post), I stuck pretty close to the original, but replaced raisins with more chocolate. In this formula, butter ratio is 48%, and yolk ratio is 41%, slightly less than the Francesco Elmi version (53% and 50% respectively), but the extra cocoa and chocolate make up for the richness.

I love sourdough panettone for it's complex flavor profile: richness from all the butter and yolk, with slightly sour note from the stater lingering in the background. In this version, dark chocolate adds another level of flavor, making the bread even more decadent and complex. With a thorough kneading, and proper(very long) fermentation, the crumb is tenderly soft, yet still a little "bouncy".

Two kinds of toppings: one was the chocoalte glaze from AB&P, the other one was scoring and hiding butter pieces underneath (from the forum post), both turned out delicious.

Even after stuffing more dough into the paper moulds than I should (1000g should be perfect, but I kept adding 1100g of dough into each mould because I want my friends to have more delicious breads to taste), I had some dough leftover. It turned out that <200g of dough was perfect for my Chinese cube pullman tin (baked with cover).

Wrapped up and ready to be shipped. This is probably the last batch this year. Time to get some rest and figure out what to do with 100+ egg whites I have in the freezer!


txfarmer's picture
txfarmer

Sending this toYeastspotting.
Click here for my blog index.

I am glad that my post on laminated sandwich loaves got a lot of interests, here's a variation on that formula. Changes I made this time:
1) In the main dough I used 103g of ww flour and 258g of bread flour, rather than 361g of bread flour, which brings the ww ratio to be 20% for total formula.
2)Did two folds (one 4-fold followed by a 3-fold), rather than 3 folds (one 4-fold followed by 2 3-folds)
3)Used differnt tins. For the "golden brick tin" (which is quite common in China), I used 3 groups of braids, each group weighted 120g (for all 3 strands together).
Before proofing

After proofing

For my new mini Chinese pullman pan, I used one group of braid, weighting 225-250g for all 3 strands together.
Before proofing

After proofing

Everything else remained the same, the mini loaves were baked uncoverd.

The "golden brick" was baked covered, to create ...well a brick. One less folding lead to less layers, but each layer is more dinstinct. BTW, the folden brick loaf needs to be cooled on its side like below to avoid sinking on the top.

Crumb is still very open, but one less fold lead to less holes, but each hole was larger. Apparently the "industry standard" for such breads only require two folds (4-fold and 3 fold like what I did for this variation), but some customer (including me) prefer the more even crumb of the 3 folds process. 20% of ww flour does bring an extra dimention to the flavor profile, I like it better than the all white flour version.

Had some extra dough in the end, so I just divided them into 3 strands, made a braid, rolled up, and dumped into the copper tin in the picture below. It turned out much better than I expected!

This style of bread is easier than croissants and danishes since the final dough doesn't need to be rolled out as thin. The trick is to figure out how much dough to use for your particular tin, and how to group and arrange the braids.

txfarmer's picture
txfarmer

Sending this toYeastspotting.
Click here for my blog index.


It all started with a trip to my neighborhood organic market. My first time there, and I was quite disappointed actually, way overpriced (Whole Foods seemed practically frugal in comparison), and the selection is just OK. However they did have Poilane Miche straight from Paris, which ended up being my only purchase from there. It was sold by quarters, but I did get a sense of how large the bread is. Crumb is fairly dense, but full of flavor, a bit more sour than what I usually bake. Crust is not hard or crispy, due to the packaging and shipping time I assume. 

Inspired, I decided to bake a miche of my own. Still went with the SFBI formula I used before (posted here), which was originally posted by David (here). I did do a few things differently:
1) Instead of a blend of ww and AP flour, I used Golden Buffalo, which is an organic high extraction flour.
2)Instead of a white starter, I used my rye starter, which is VERY active and flavorful.
3)Instead of bakion on the stone with steam, I baked it in my large Staub cast iron pot. Preheated at 500F for nearly one hour, slash, load the loaf, cover, bake at 450F for the first 20min, remove lid, lower temp to 430F, bake for another 40min, turn off oven, open the oven door a little, leave the loaf (in the pot) in oven for another 20min before taking out.
4)My cast iron pot is oval so I shaped the dough into a batard, which is not the "usual" shape for miche
5)The scoring was borrowed from breadsong's post here, thank you so much!
Everything else remained the same, including the 2KG size, as well as fermentation/proofing schedule.

I really like how the scoring showed up

Such large loaves tend to flatten out on the baking stone, but in a pot, it had a very tall profile

A side by side comparison of the crumb between my miche and Poilane. The texture look kinda similar, but taste different: my miche (upper left) is less sour, has a more "sweet" taste than Poilane (lower right). I really liked the use of rye starter, it adds another dimension to the flavor profile.

I don't know which day the Poilane Miche was baked and shipped, but by the time I was eating it, it was a tad dry. I kept my miche wrapped for 24 hours before cutting in, and it tasted the best after 48 hours. Hmmm, I don't think I will go to that merket again, if I were to buy Poilane Miche again, I would get it in Paris, when its flavor is at the prime.


txfarmer's picture
txfarmer

Sending this toYeastspotting.
Click here for my blog index.


Continuing with my obession for laminated dough...

Unlike the laminated sandwich loaf  I made last time, these cheese danishes are definitely all American. The dough I used was very similar to the laminated sandwich loaf, with a tad less liquid to make the crumb layers more crisp. Since these are meant to be snacks, the dough is richer than croissants, also uses more roll-in butter. However, the lamination process is exactly the same as croissants: 3 book folds, and roll out to about 4mm thickness.


Laminated Sandwich Loaf (Adapted from many different sources)
Note: for details and tips on making croissants, please see this post
Note: this recipe makes about 930g of dough, about 12 large danishes.

-levain
starter (100%), 44g
water, 75g
bread flour, 134g

1. mix and leave at room temp for 12 hours.

-final dough
bread flour, 361g
milk, 135g
egg, 77g
sugar, 60g
salt, 10g
instant yeast, 7g
butter, 41g, softened
levain, all
roll-in butter, 310g

-cheese filling
recipe here

1. make the dough following the procedure illustrated here in this post
2. Cut the dough into 4.5X4.5inch squares, and shape into half pockets or full pockets by folding two or four corners into the center


10. Proof at around 27C until more than double and layers are visible, about 3-4 hours in my case. If seal opened during proofing, press corners back into the center, and press down to seal well. Sqeeze cheese filling in the middle and decoreated with blueberries.

11: Bake at 425F for 10min, lowered to 375F and bake until done, about 15 min more.

Shattering crispy layers and decadently rich flavor

Gotta say I am usually not a big fan of store bought danishes which often are doughy, flavorless, and too sweet. However, these really rock!

txfarmer's picture
txfarmer

Sending this to Yeastspotting.

Click here for my blog index.

Don't get me wrong, they are all delicious, I just love this 36 hr SD baguette formula and its endless variations. However, some favorites just jump out from time to time.

1) Recent favorite: Almond meal baguette

AP Flour, 425g
ice water, 325g
almond meal(I recommend to grind them yourself, the store bought almond meal usually is less flavorful and too fine), 100g
salt, 10g
white starter (100%) 150g

-Mix flour, almond meal, icewater, and autolyse for 12 hours.
-Mix in salt, starte, then follow the basic 36 hour sourdough baguette formula here.

A lot of cakes and cookies use almond meal to enhance flavor and texture, it does the same thing here. So fragrant!

Goes well with both savory and sweet fillings. I plan to try nuts other than almonds too. A big hit.

2)With black olives. Lots of them.

AP Flour, 425g
ice water, 325g
black olives, 100-150g
salt, 10g
white starter (100%) 150g

-Mix flour, almond meal, icewater, and autolyse for 12 hours.
-Mix in salt, starte, then follow the basic 36 hour sourdough baguette formula here.

I planned to only use about 100g of olives, but "accidentally" dumped whatever is left all into the dough, probably more than 150g. That's why olives were practically bursting out of the seams. Tasted great though, a happy "accident".

The crazy amount of olives affected the crumb a bit, but not too bad.

3) With dried mushroom
AP Flour, 425g
ice water, 325g
dried mushroom, 50g
salt, 10g
rye starter (100%) 150g

-Soak mushroom in warm water for 5-10min. Add enough ice water, so that the weight of mushroom+water is 325+50=375g. Mix in flour and autolyse for 12 hours.
-Mix in salt, starte, then follow the basic 36 hour sourdough baguette formula here.

I love mushroom flavor, so I love this variation, even though wet and sticky mushroom does make the crumb less open, somewhat.

txfarmer's picture
txfarmer

Sending this toYeastspotting.
Click here for my blog index.


After weeks of driving, moving, and settling down, I've finally gotten my new kitchen more or less in order and ready to start baking/bloging again. Loving everything about Seattle so far, the active lifestyle, the urban living environment in downtown, the seafood, the "green" mentality -- I even like the grey weather! It's good for making laminated dough... :P


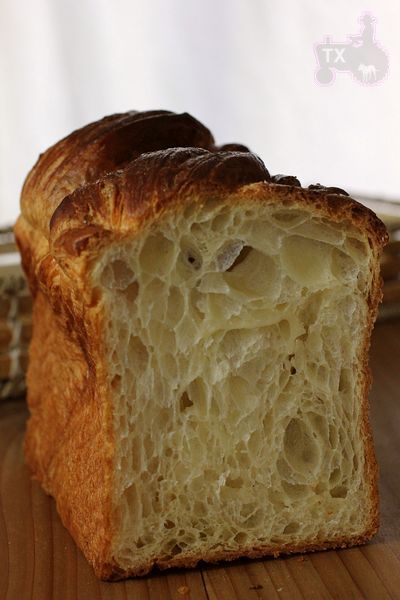
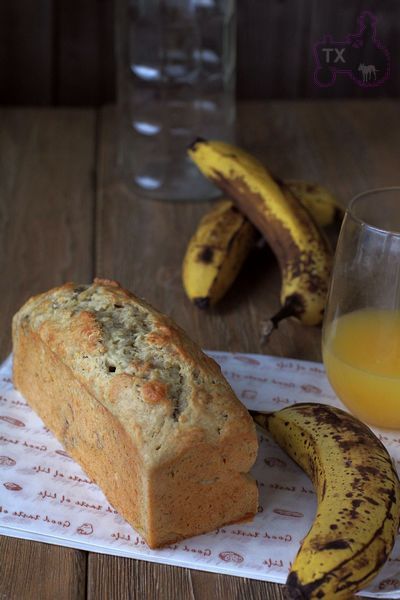
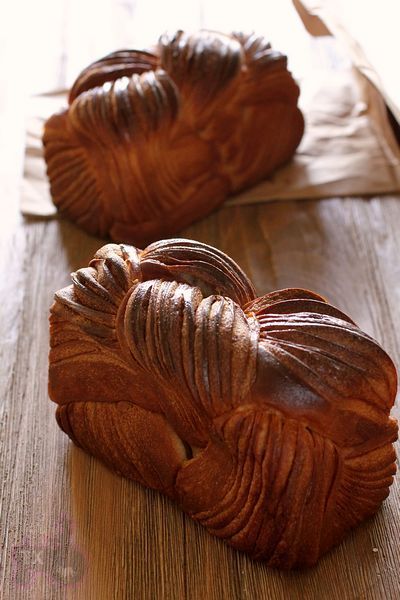
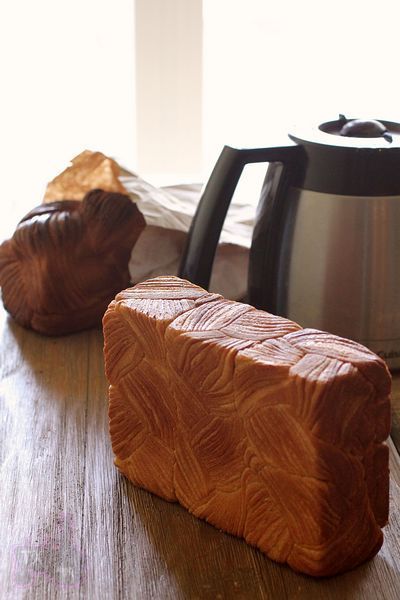
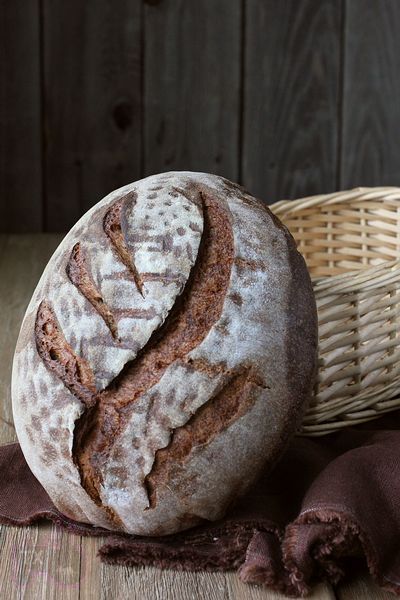
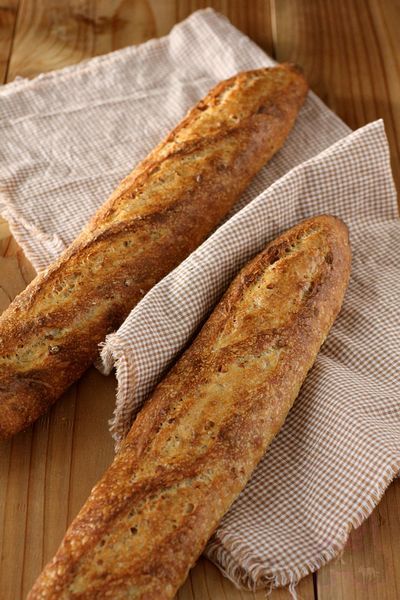
Now back to bread, this is a very Asian bread, I don't think I have seen anything similar in a western bakery. It's essentially the love child of Danish and Asian Style Soft Sandwich bread, inheriting the best qualities of both parties: nice and crispy on the outside, soft inside, and full of buttery goodness. While still a laminated dough, in order to rise high in the sandwich tin, it differes from croissants(tips here) and traditional danishs in following ways:
1. For croissants and danishs, we usually keep the dough fairly dry to ensure crisp and clean layers. While more kneading would make layers seperate more, resulting in a better crumb, we usually don't knead the dough to fully developement for the ease of rolling out. However, Asian style soft sandwich breads need to be kneaded very well to pass a very thin and strong windowpane test, otherwise the bread volume would suffer, and the texture won't be shreaddably soft (see details here). For this bread, we do knead the dough well (similar to other Asian style soft sandwich breads). In the mean time, the dough is kept pretty wet to have more extensibility, which make it possible to roll out.
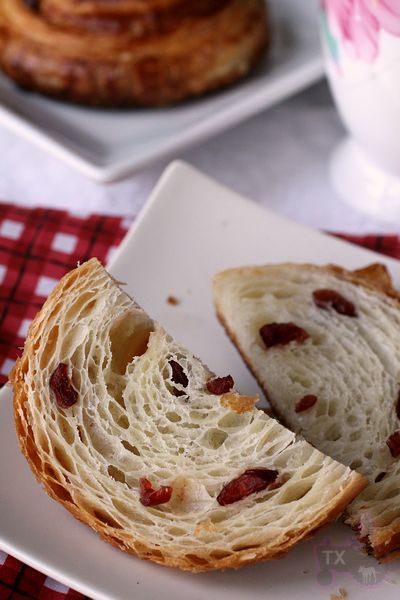
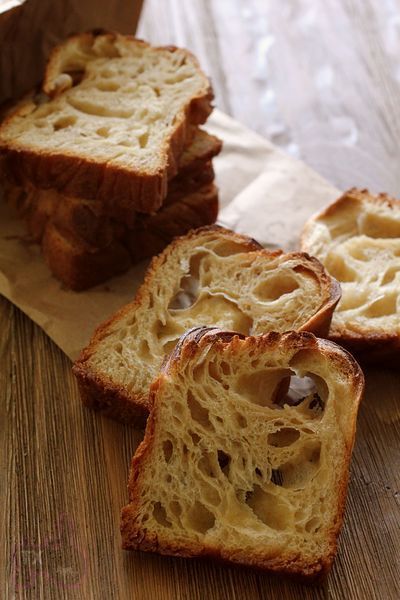
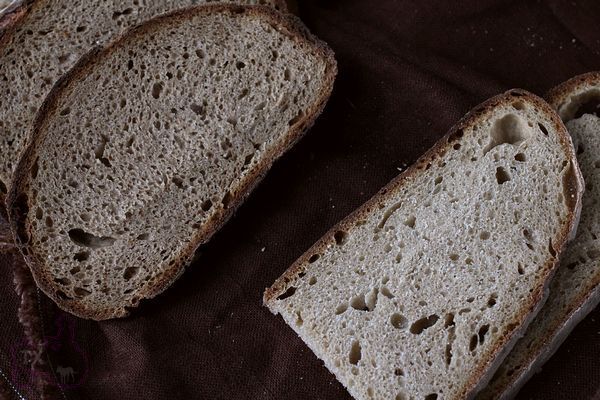
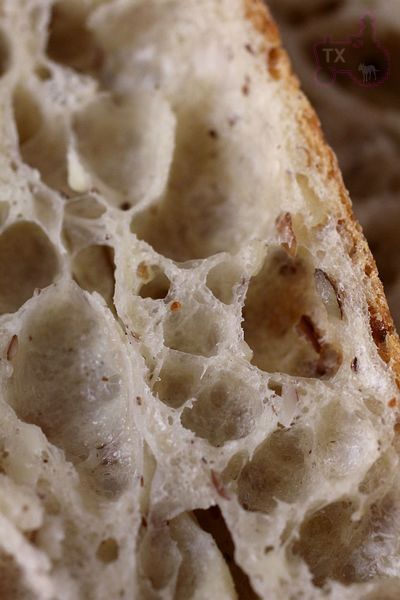
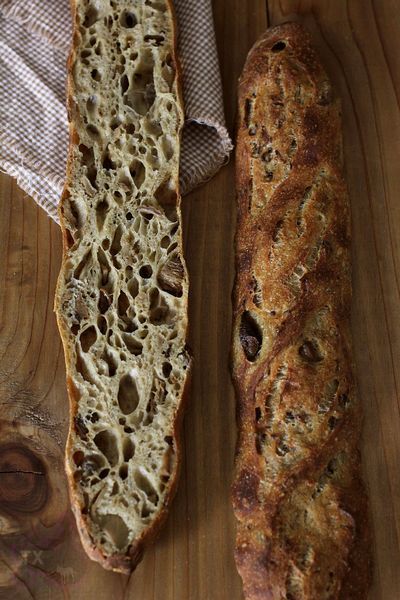
2. Since the dough is fairly wet, and shaping procedure is different from traditional croissants, we don't expect as many honeycomb-like holes in the crumb, instead, crumb just need to be fairly even and open. In the mean time, the final dough doesn't need to be rolled out very thin (15mm instead of 4mm for croissants). For those reasons, the amount of roll-in butter is considerably less than croissants.
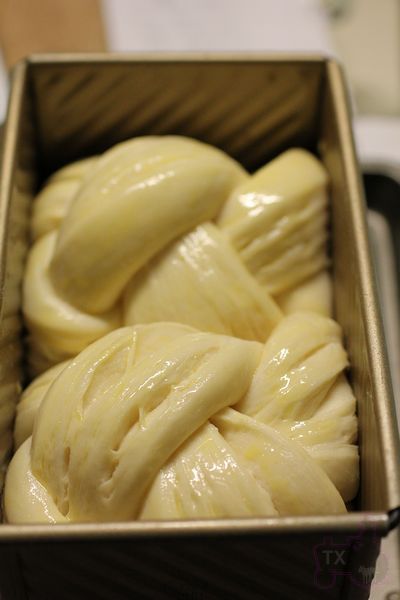
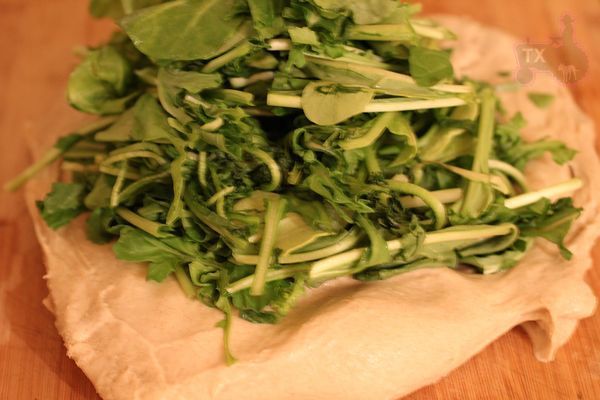
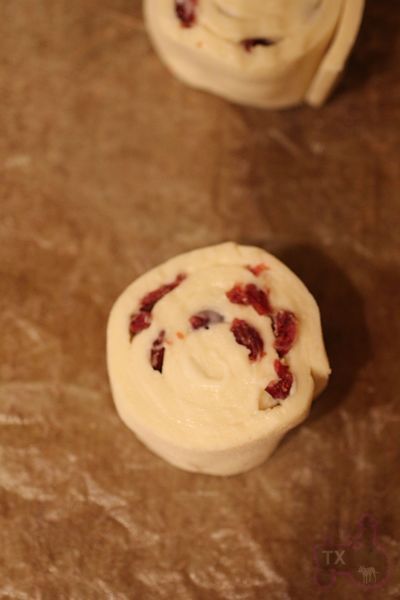
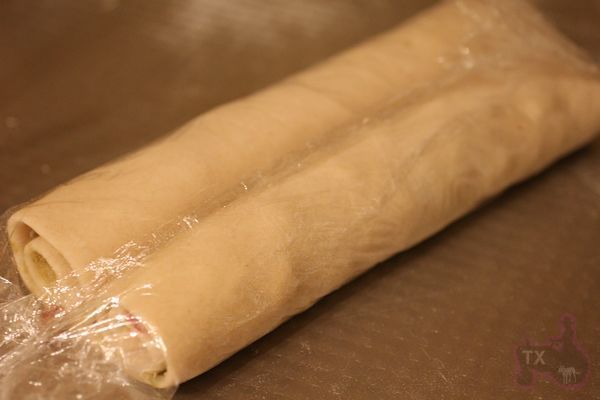
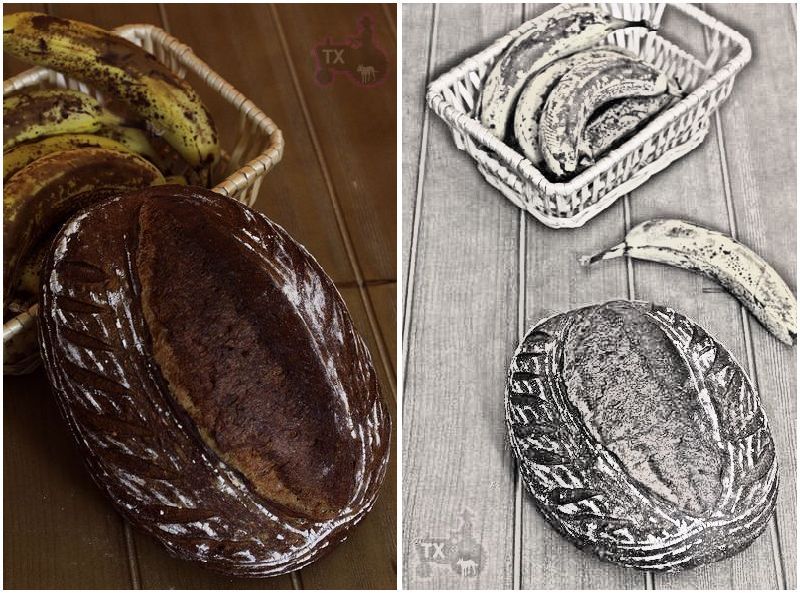
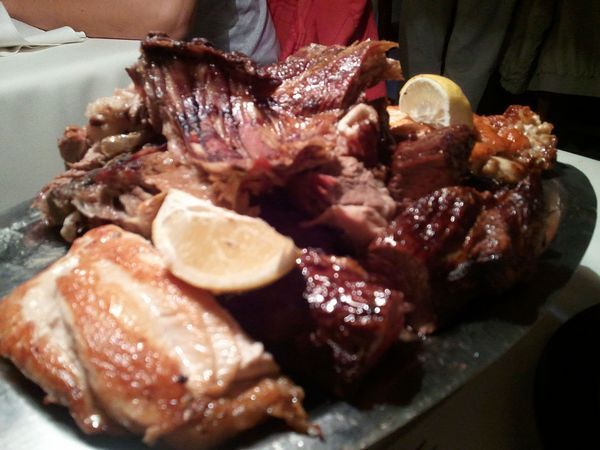
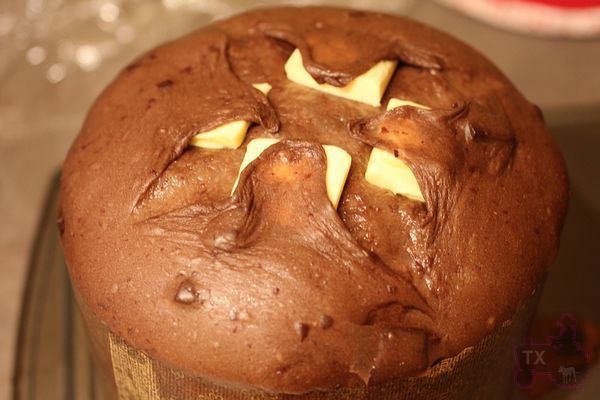
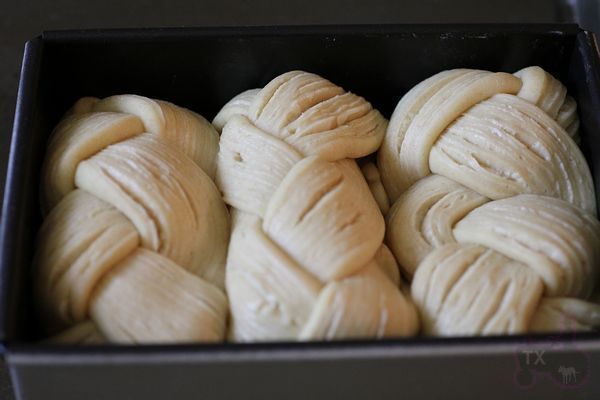
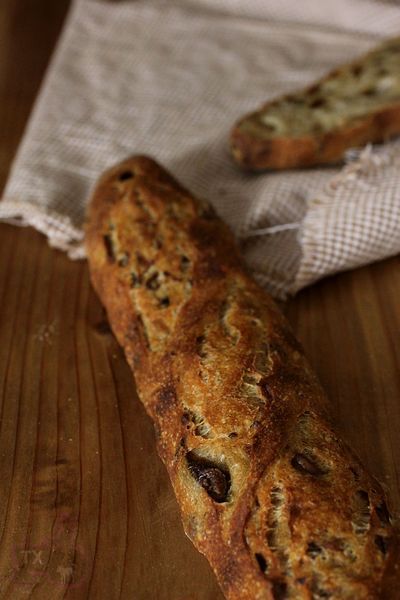
3. While for this particular batch in the first photo, I did one 4-fold, and two 3-folds, but this bread usually requires less folding than croissants. The most common method is one 4-fold, and one 3-fold, which I tried in another batch with good result.
In summary, since the dough requires less folds, and doesn't need to be rolled out very thin, it's an easier laminated dough than croissants and danishes. However, it does have different challenges: the intensive kneading to full developement, the final shaping which requires concise cutting and weighing, as well as braiding.

Laminated Sandwich Loaf (Adapted from many different sources)
Note: for details and tips on making croissants, please see this post
Note: for tips on kneading soft sandich loaves see this post
Note: this recipe makes about 930g of dough, less or more depending on how much you trim off the edges etc.

-levain
starter (100%), 44g
water, 75g
bread flour, 134g

1. mix and leave at room temp for 12 hours.

-final dough
bread flour, 361g
milk, 145g
egg, 77g
sugar, 60g
salt, 10g
instant yeast, 7g
butter, 41g, softened
levain, all
roll-in butter, 245g

1. Mix everything other than butter, knead until gluten starts to form. Add in butter, mix until fully developed. see this post for details.

2. Round, press flat, put in fridge immediately for 2 hours.
3. Make butter block, put in fridge for at least one hour before using.  Take out the dough, roll out, and enclose butter. (see this post for details)
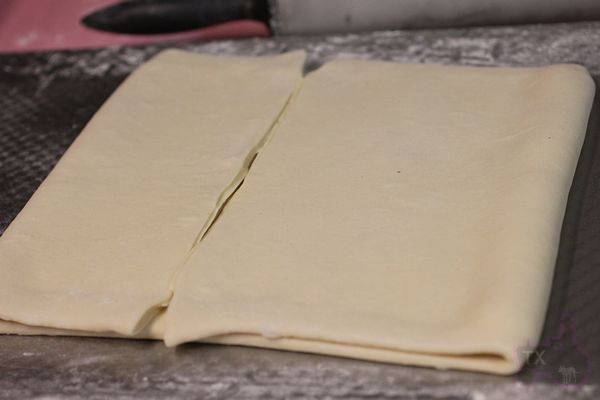
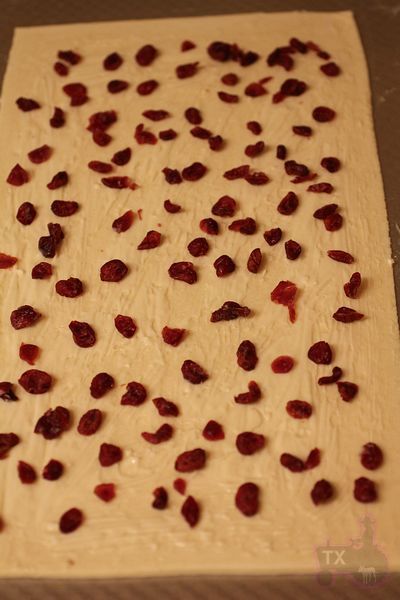
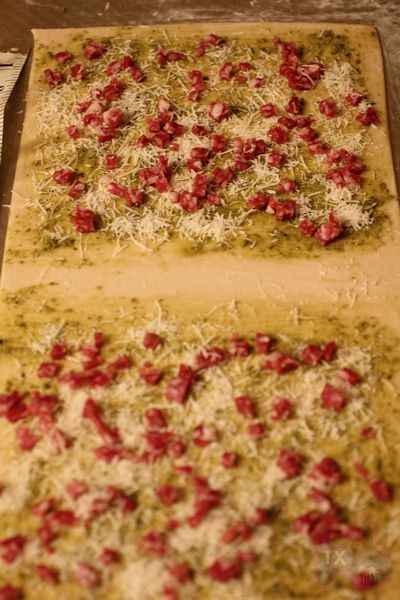
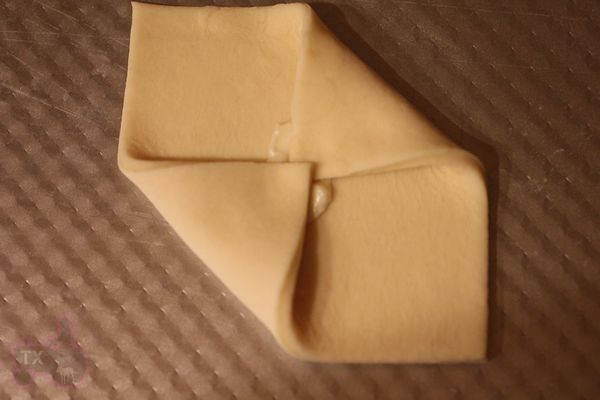
4. Roll out to 20X60CM, fold one 4-fold as in the following pictures. Put in fridge for one hour


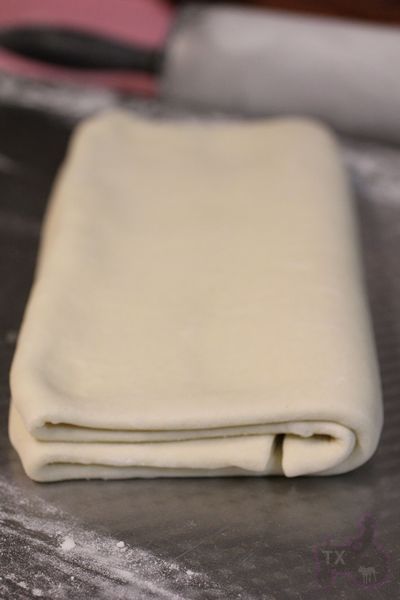
5. Roll out again and do one 3-fold, put in fridge for one hour. (see this post for details)
6. Repeat 5. (optional)
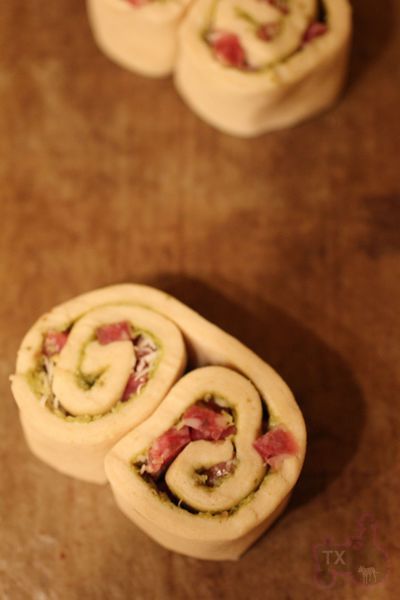
7. Roll out dough to 1.5CM-2CM thickness. Length of the dough piece  would depend on the tin you use. Since we are braiding them, you will need the length to be about 2X length of the tin.
8. Cut the dough into thin pieces. This is where experience becomes important. We are braiding 3 pieces into one group, each group need to have a certain weight. Do note that if a tin requires more than one group of dough, each group should weigh the same, otherwise bread would appear uneven at the end. In another word, for each tin, select a weight for each dough group (less for flat top, more for round top),  then stick to that weight for each group of dough.
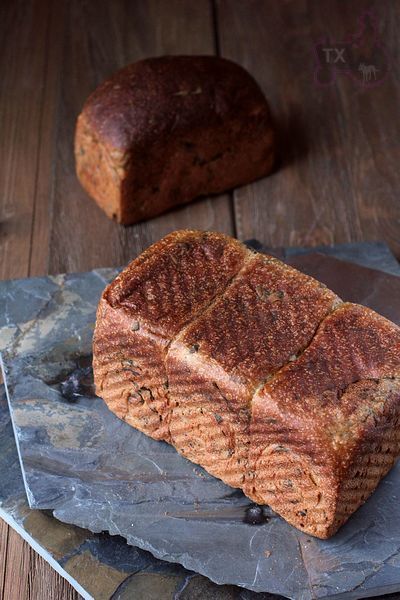
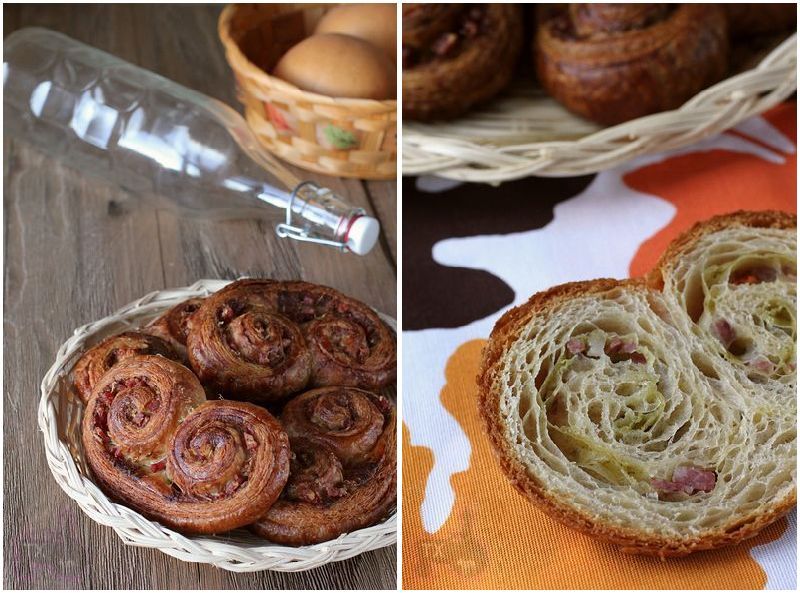
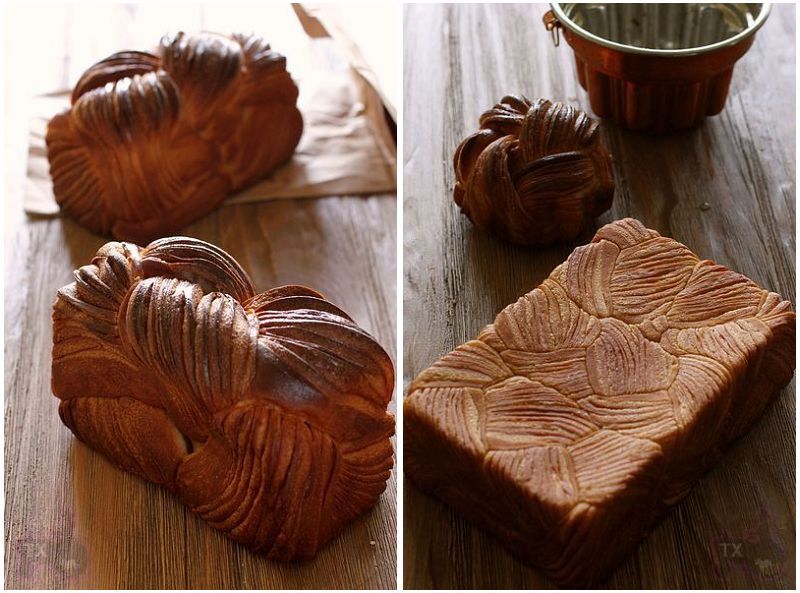
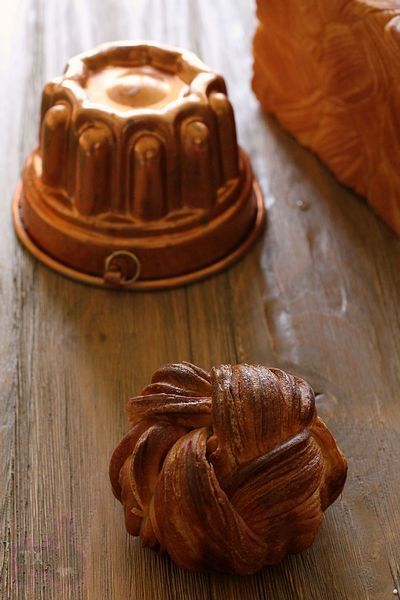
a) For my bigger Chinese pullman tin (pictured on the left), I need 2 groups, each group has 3 pieces, and each group (all 3 pieces together) weigh 225-250g (225g if cover of the tin is used to make a flat top shape, more if cover is not used to make round top as in the picture).
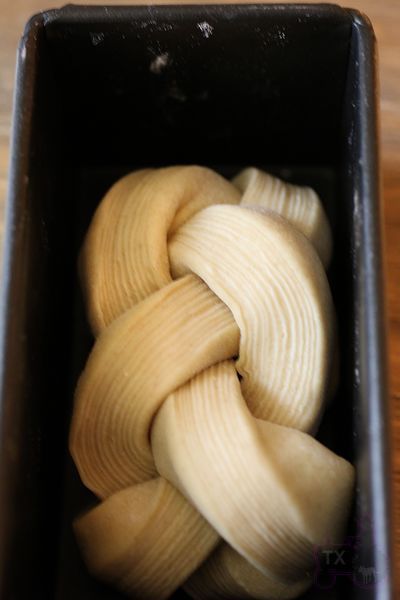
b) For my small Chinese pullman tin, I only need one group of 3 pieces, each group (all 3 pieces together) weigh 150g (if cover of the tin is used to make top flat).
c) For 8X4 US loaf tin,  I suggest to use 2 groups, each group has 3 pieces, and each group (all 3 pieces together) weigh 250-270g.
d) For KAF 13X4X4 pullman pan, I would suggest to use 4 groups, each group has 3 pieces, and each group (all 3 pieces together) weigh 195-215g.
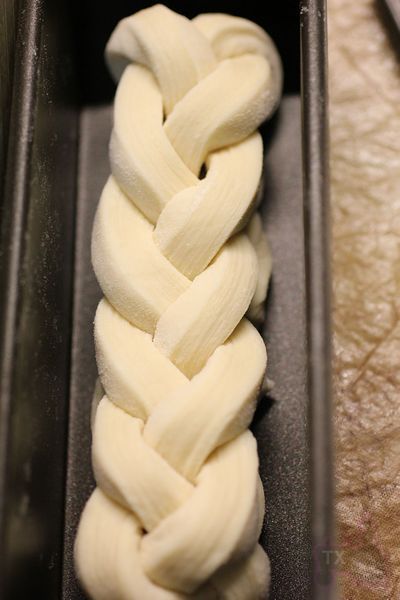
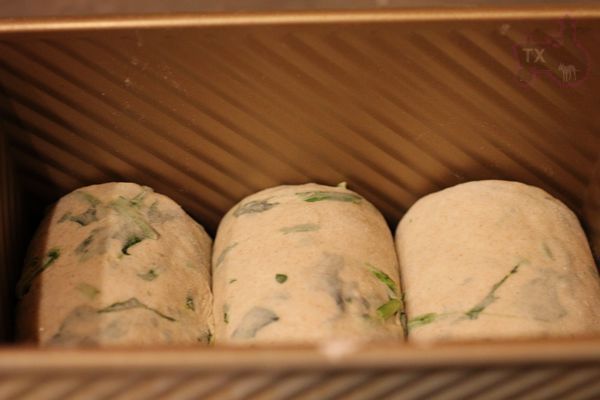
9. For each group of 3 pieces of dough, braid them. Make sure the cut surface is facing up, to expose the layers. Fold ends under, put into tin.

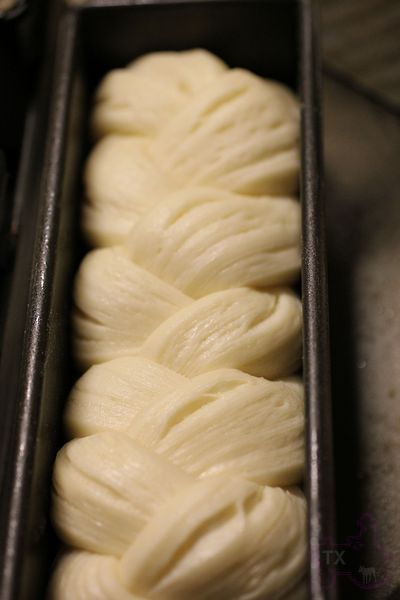
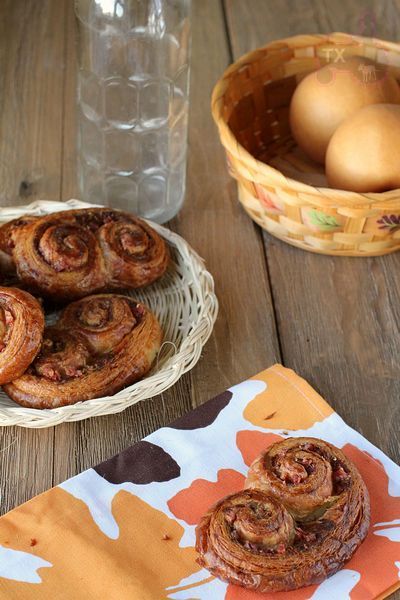
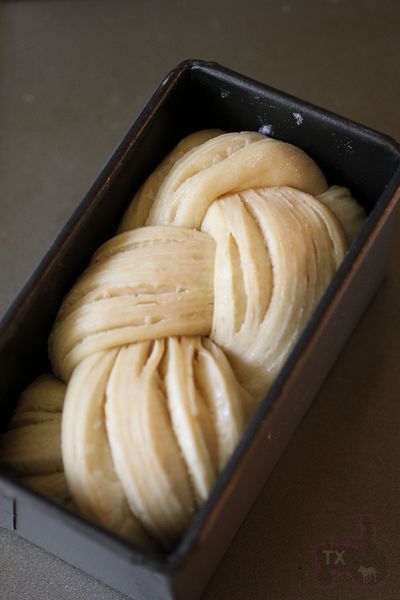
10. Proof at around 27C until 80-90% full, about 4-5 hours in my case. Egg wash if you are not using the pullman pan cover.


11: Bake at 425F for 10min, lowered to 375F and bake until done. The bigger Chinese tin which took 450g - 500g of dough, needed about 40-45min of TOTAL baking time. The smaller tin which took 150g of dough, needed 30min in total. If colors too much, cover with foil.


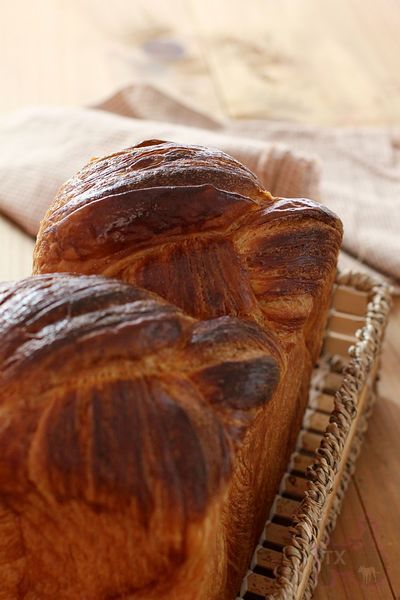
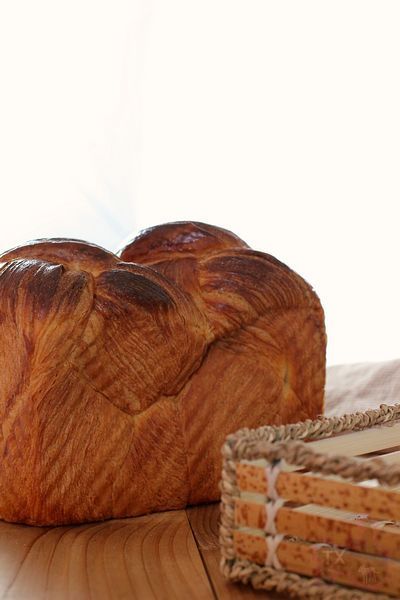
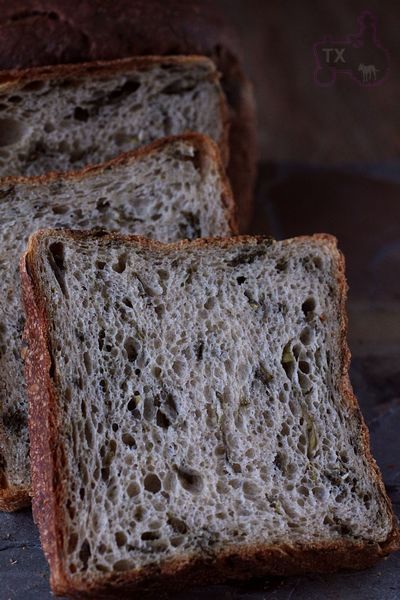
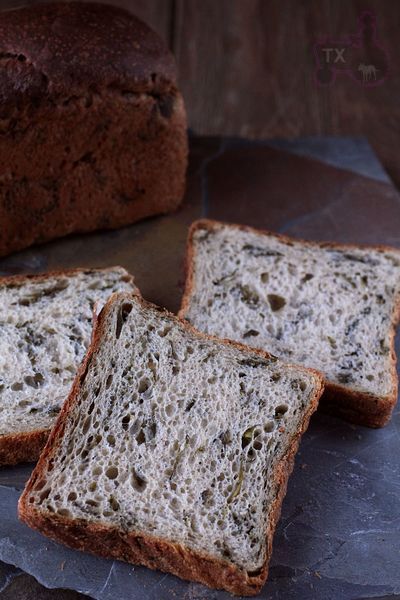
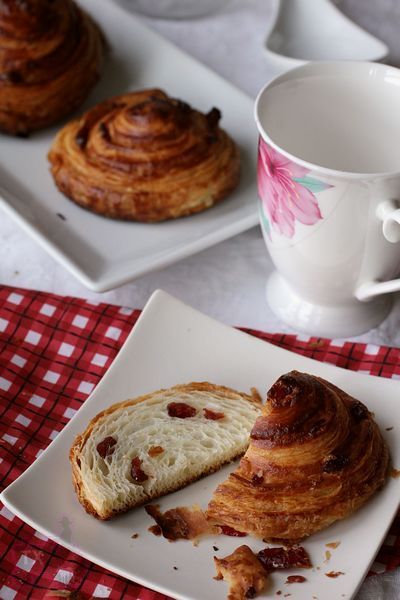
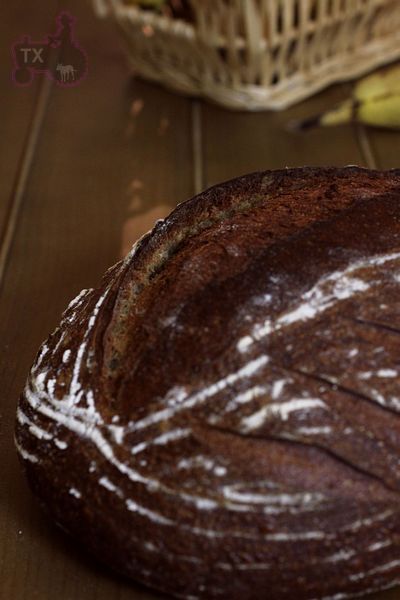
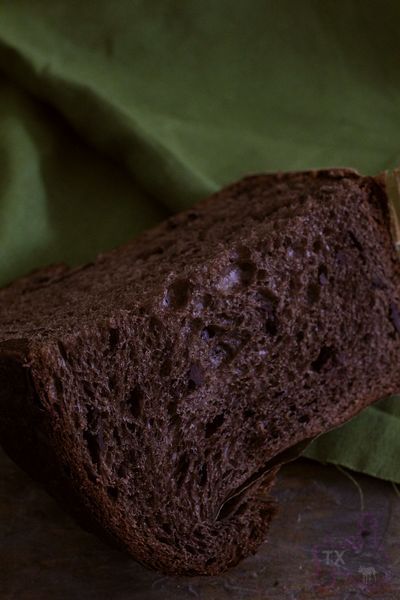
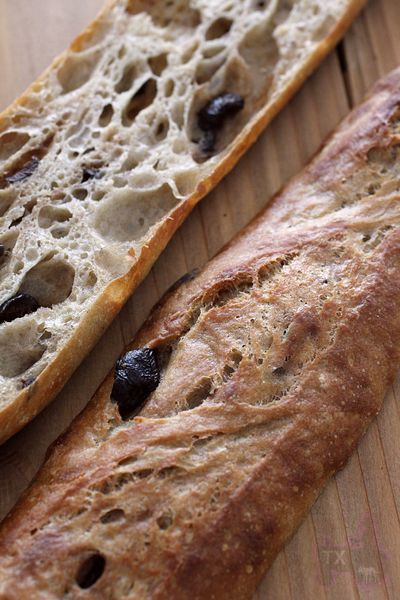
If the gluten network is fully developed, the bread should be proud and tall, with clear layers visible.

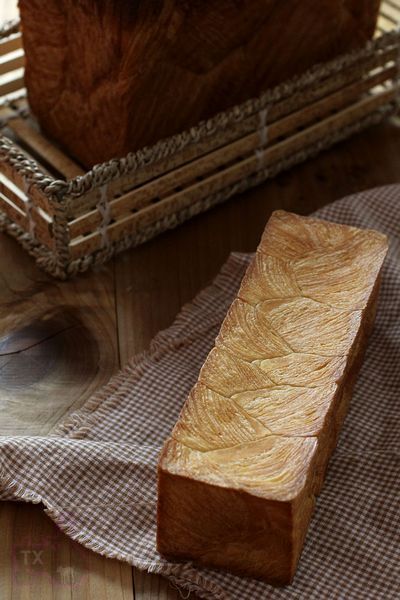
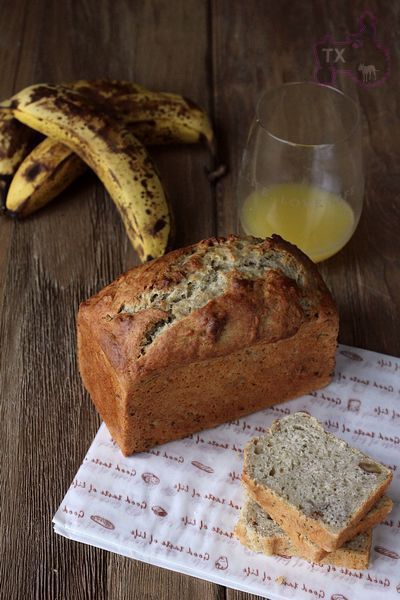
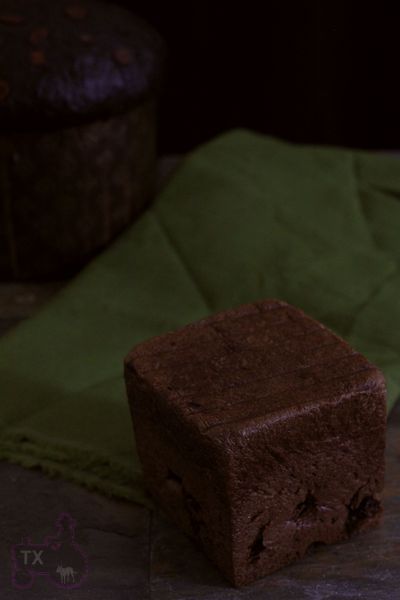
If the pan cover is used, the dough amount needs to be fairly accurate for the pan, other wise it's each too short (not reaching the top), or bursting out (the cover can literally be blown open). This neat rectangle shape is nicknamed "golden sticks".

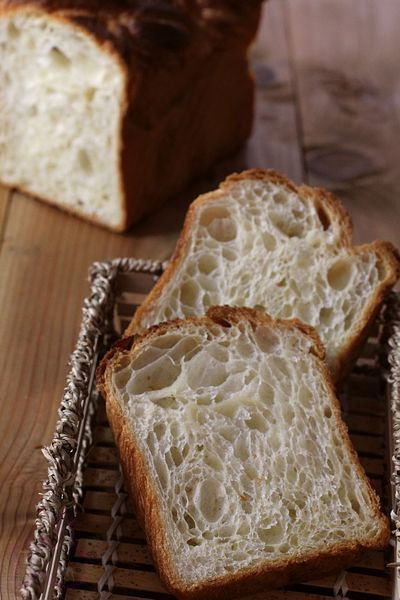
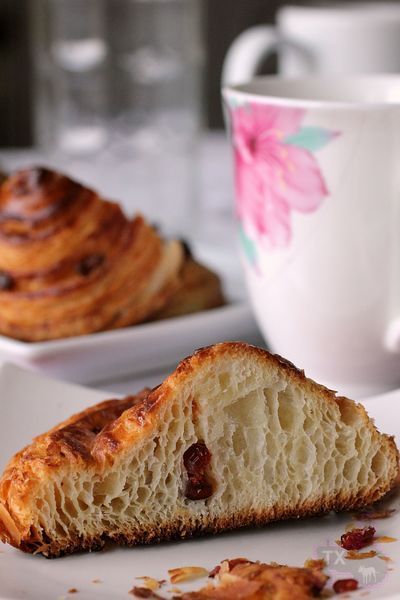
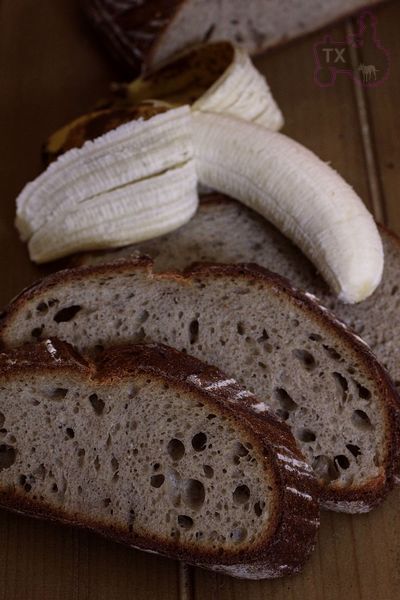
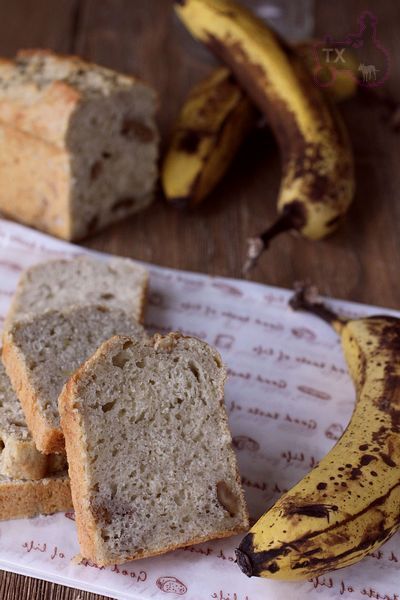
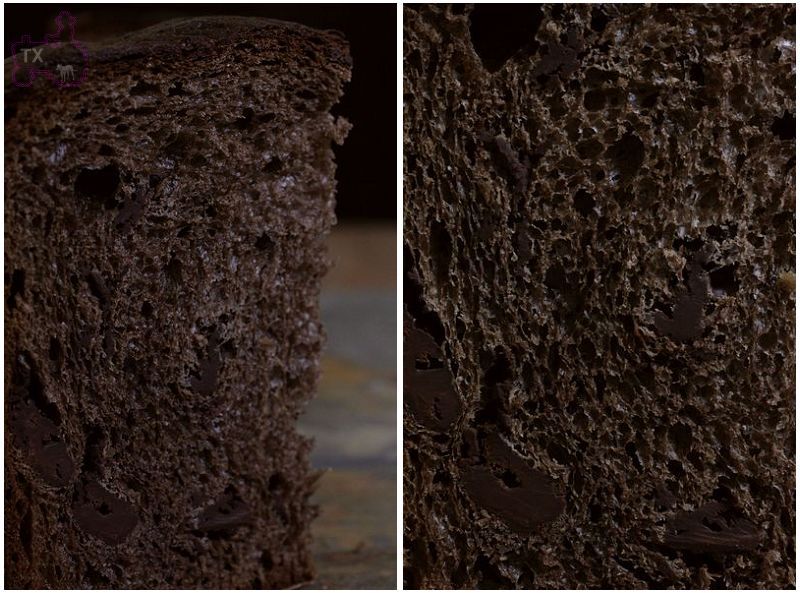
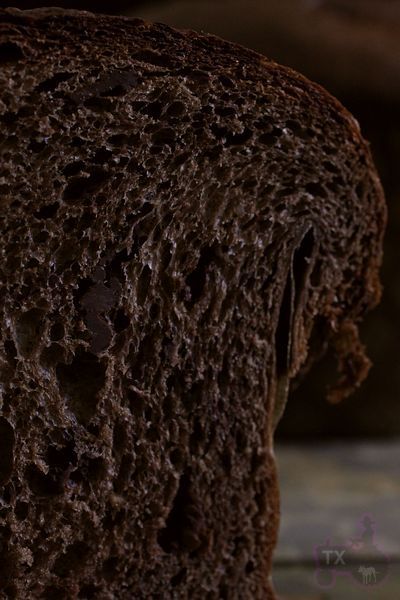
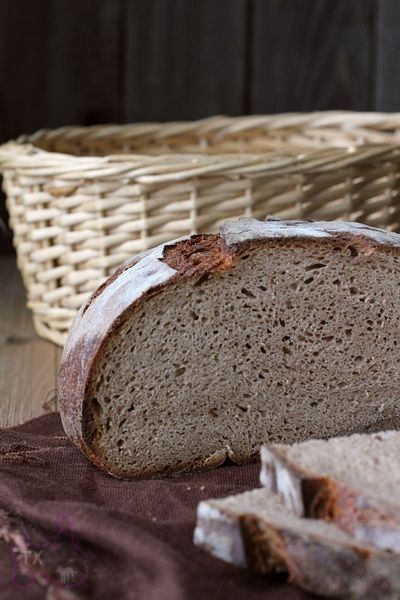
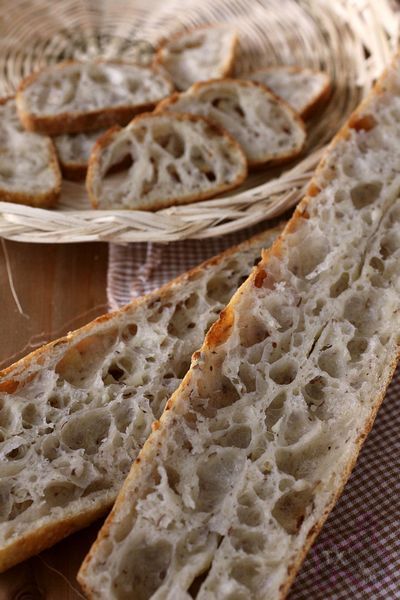
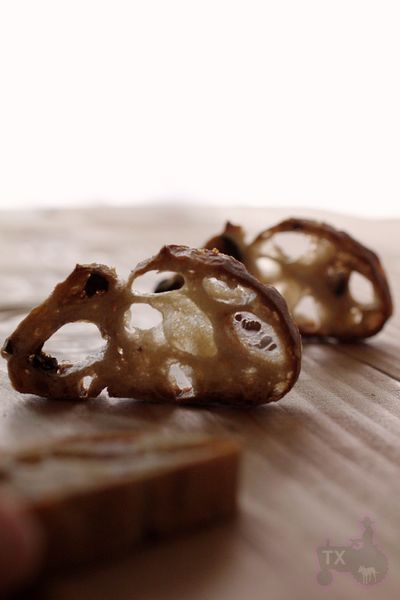
The crumb soft but open with honeycomb structor.

In general, I feel it's easier than croissants, since you can fold less and doesn't have to roll out as thin. However, the success does depend on proper kneading and careful piecing and shaping.


Pages

Subscribe to RSS - txfarmer's blog