The Fresh Loaf

A Community of Amateur Bakers and Artisan Bread Enthusiasts.

emkay's blog

emkay's picture
emkay

Glenn mentioned that the San Francisco country sourdough formula was a variation on a variation of Hamelman's Vermont sourdough. So of course I had to try it. Although, since I am in SF I guess this makes my VT Sourdough a SF sourdough. The husband and I both agreed with Hamleman's assessment that this is an excellent everyday bread.

I proof retarded for 18 hours. Instead of using a cast iron combo cooker like I have been doing, I baked on a pizza stone using a large stainless steel bowl as my "cover". I baked the boule seam side up with scoring. (Hmm, my scoring needs work. It's totally off centered.) I removed the SS bowl after 15 minutes.


vtsd_boule_0401a

vtsd_boule_0401c

vtsd_boule_0401d


I also used some of the VT sourdough to make a mini loaf in a pan. I didn't retard this one.


vtsd_loafpan_0331


Some freshly milled rye flour from Josey Baker that went straight into Hamelman's sourdough rye with walnuts. I added 1.5% yeast per Hamelman's instructions, but I think I will leave it out next time.


rye

sd_rye_walnuts_0326


And my weekly croissants. I used Hamelman's recipe as published in Fine Cooking.
croissant_0326d

emkay's picture
emkay

I think my 17-day old starter is ready for prime time. I baked this San Francisco Country Sourdough using Glenn's formula.


sfsd_0324c

  • Everything was done at room temperature (approximately 73F). No retarding.
  • Autolysed for 45 minutes, then I pinched in the salt and 50 g reserved water.
  • Bulk fermented for 4 hours (S&F every 30 minutes for the first 3 hours and then untouched for 1 hour).
  • Preshaped and bench rested for 30 minutes.
  • Proofed seam side down in brotform for 2.5 hours.
  • Baked with seam side up (no scoring) in a preheated cast iron combo cooker.
  • 450F for 20 minutes with the lid on and 25 minutes with the lid off. 


sfsd_0324b

sfsd_0324d

It's the best naturally leavened bread I have baked to date. Well, that's not really saying much since this is only my 4th time baking bread using a starter. But I think it's a good start!


sfsd_0324a


:) Mary


emkay's picture
emkay

I made zolablue's (Dan Leader's) semolina sandwich loaf. It definitely had some rising power!

Proofing for only 30 minutes

semolina_loaf_30min_proof

Baking in the oven


semolina_loaf_oven

Monster loaf


semolina_loaf_mutant

semolina_loaf_height

Crumb shot (sadly with a huge air pocket)


semolina_loaf_crumb

I also baked rye bread using Michael Ruhlman's recipe .


rye-ruhlman

And I'm always practicing my croissants. I was quite pleased with the honeycomb structure in these chocolate ones.


croissant_0318a

croissant_0318b

Starter update:

My starter is now 15 days old. Around day 11, it started smelling like acetone. I've spent the past 4 days trying to get rid of the acetone smell. With all the great advice in various past TFL posts, I was able to remedy the situation. And if all goes well for another couple days, I can move it from the kitchen countertop (with daily feedings) to the refrigerator (for less frequent feedings).

emkay's picture
emkay

Drinking, eh, I mean, baking for Saint Patrick's Day...
spd

Guinness chocolate cupcakes
choc_stout_cc_baked

Cored and ready to be filled
choc_stout_cc_cored

With a chocolate truffle ganache made with Jameson Irish Whiskey
choc_stout_cc_filled

And frosted with Baileys Irish Cream Swiss buttercream
choc_stout_cc_frosted

Eat
choc_stout_cc_inside

emkay's picture
emkay

My starter seed culture is in Phase 3. I can't wait to start making sourdough. In the meantime, I made a krantz cake with chocolate and pecans. The recipe is from Yotam Ottolenghi's "Jerusalem".


krantz_cake_1a

krantz_cake_1d

emkay's picture
emkay

My starter seed culture is not ready yet so I'm practicing bread with commercial yeast in the meantime. I read in another TFL post that it's possible to make "artisan" bread using commercial yeast and was pointed to this link for Forkish's white bread with overnight poolish from FWSY.

I replaced about a fifth of the white flour with whole wheat, adjusted the quantities to make a smaller loaf since I only had 300 g poolish, and shortened the bake time to account for the smaller loaf. I floured a tea towel with rice flour and lined a SS bowl for the final rise. I guess I didn't flour it enough because the dough still stuck to the towel a little bit. I baked it in an enameled cast iron combo cooker at 450F for 25 min with the lid on and 20 min with the lid off.


poolishwhite1a

I liked the interior crumb and the top crust was decent. But the bottom was quite thick, hard and tough. Too tough to chew. I'm not sure if I overbaked it or didn't let it proof long enough.  I don't know if you can tell me how I can "fix" the bottom by just looking at my photos, but any help/advice would be appreciated. Thanks!

Mary

emkay's picture
emkay

I made the Tartine country loaf on two separate occasions and both didn't turn out right. Maybe the Tartine country loaf was an overly ambitious first try at a bread made with a starter? Before making my first Tartine country loaf, I had never made nor maintained a starter before nor had I ever made a leaven. But I followed all the directions laid out in the Tartine Bread book. When my starter was rising and falling predictably, I made the leaven. I tested the leaven and it floated so I guessed it was ready to use.

Attempt 1. The flavor was a bit bland for lack of a better description. It was nowhere close to the real Tartine country loaf. The exterior slices were edible, but as I got to center of the loaf, it was so dense that I couldn't even eat it.


tartine_country_1c tartine_country_1d

Attempt 2. A couple weeks later I tried again. I had to make a new starter since I didn't maintain the first. This time the flavor was quite nice. I could detect hints of that "Tartine flavor". It had more holes and was less dense than loaf 1. 

tartine2a tartine2c


emkay's picture
emkay

For a long time I was scared of using yeast. Although I am still a novice at bread making, the fear has subsided. In addition to learning bread making, I've always wanted to tackle laminated and enriched doughs. Viennoserie is like a happy place where cakes and bread meet. For some strange reason I find Viennoserie less scary than bread. With bread, there is no place to hide my mistakes. It's flour and water (and salt and yeast). With Viennoiserie, mistakes are still noticeable, but the butter, sugar, eggs and milk make those mistakes more palatable.

I was fortunate enough to attend a 5-day Viennoiserie class at the SFBI. I wasn't sure if I could reproduce the results at home without a sheeter, proof box, and high-tech oven, but I was inspired by all the croissants seen on TFL especially txfarmer's amazing croissants. I'm using a scaled down version of the croissant with poolish recipe I learned in class (which I think is from Suas' Advanced Bread and Pastry). 

poolishcroissant

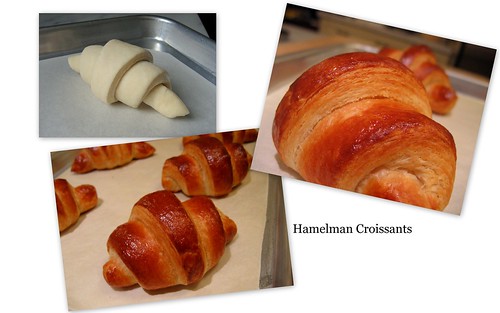
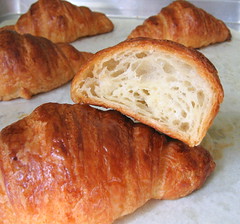
Attempt1: traditional-shaped croissants. Long story short, I used too much butter for the roll-in and I didn't proof them long enough before baking. My shaping skills need work. The croissants have too many shoulders. The layers are not distinct.
croissant 1a - traditional

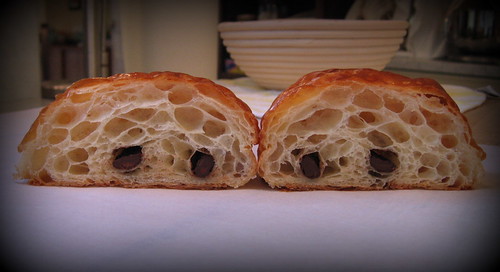
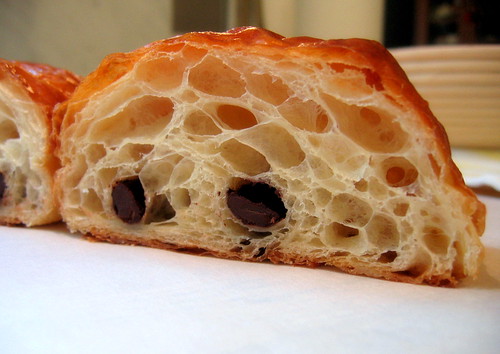
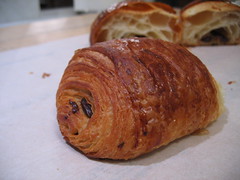
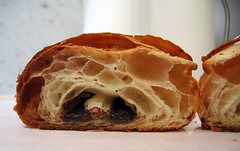
Attempt 2: pain au chocolate. I can see some distinct layering and there's some honeycombing. My results were better than those in attempt 1.
croissant 2a - chocolate croissant 2b - chocolate

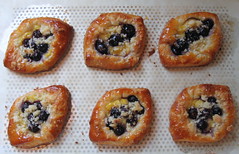
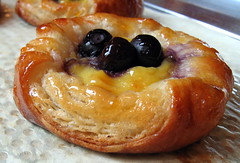
Attempt 3. I knew during the lock-in that my beurrage was too hard. But it was too late to turn back and let the butter soften a bit so I proceeded and hoped for the best. I could see that the butter layer was patchy even with each subsequent turn. (Note to self: Always make sure the detrempe and beurrage are the same texture before doing the lock-in.) I was worried about the how the patchiness of the butter would lead to uneven layering and bready croissants. So I used the dough to make blueberry danishes where the breadiness would be less noticeable.
danish-cwp_1 danish-cwp_5

Pages

Subscribe to RSS - emkay's blog